Dependencies
QMaxent's modeling engine — the elapid Python library and its companions (rasterio, geopandas, scikit-learn, matplotlib) — does not ship with QGIS. The first time you use the plugin, you install these dependencies into an isolated, per-plugin virtual environment so they do not affect your system Python or QGIS itself.
This is a one-time, ~5-minute setup.
Opening the Dependencies dialog
Choose Plugins → QMaxent → QMaxent Dependencies.
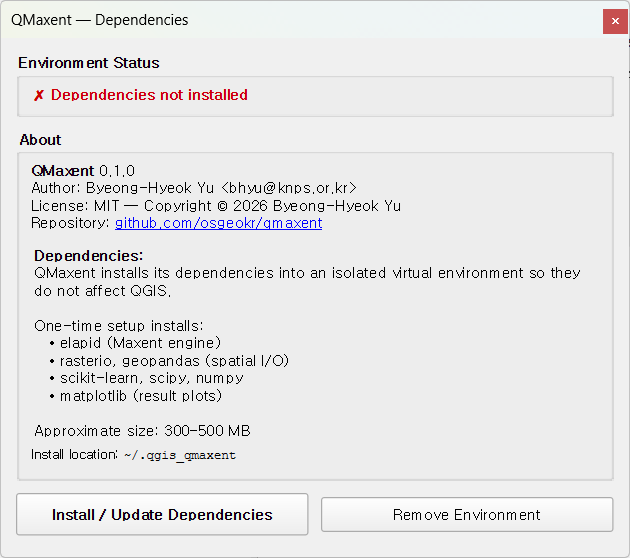
The dialog reports the current state of the QMaxent virtual environment, the plugin version, and a summary of what will be installed.
Environment Status panel
The status banner at the top tells you exactly what to do:
| Banner | Meaning |
|---|---|
| ✗ Dependencies not installed | First-time setup needed (the case above) |
| ✓ QMaxent environment ready | Everything is installed and ready to model |
| ⚠ Update available | New version of one or more dependencies recommended |
Install / Update Dependencies
Click Install / Update Dependencies. The plugin downloads the
packages from PyPI into the path shown at the bottom
of the dialog (default: ~/.qgis_qmaxent on macOS/Linux,
%USERPROFILE%\.qgis_qmaxent on Windows). Total download is approximately
300–500 MB depending on your platform; allow 3–8 minutes on a typical
broadband connection.
When the installer finishes, the status banner turns green:

You can now close the dialog and open QMaxent Analysis — the modeling workflow is unlocked.
What is installed
QMaxent installs the following packages and their transitive dependencies:
- elapid — the Maxent engine (maxnet algorithm, spatial cross-validation, projection); see Anderson (2023).
- rasterio — raster I/O.
- geopandas — vector I/O for presence points.
- scikit-learn — cross-validation, ROC, AUC; see Pedregosa et al. (2011).
- scipy + numpy — numerical core; see Harris et al. (2020).
- matplotlib — response curves, ROC, jackknife plots.
These are pinned to versions that QMaxent has been tested against; the plugin's release notes record which versions ship with each release.
Remove Environment
Use Remove Environment to delete the entire QMaxent virtual environment from disk. You might do this to free disk space, force a fresh re-install when something is broken, or switch to a different QMaxent version that pins different package versions.
After removal, the status banner returns to Dependencies not installed and Install / Update Dependencies becomes available again.
Troubleshooting
Installation fails with a network or SSL error
Most often this is a corporate proxy or firewall blocking
PyPI. Ask your administrator to allow pypi.org
and files.pythonhosted.org. The installer respects QGIS's proxy
settings, so configuring those in Settings → Options → Network
usually fixes it.
Disk space exhausted during install
The installer needs roughly twice the final size as scratch space while extracting wheels. Free at least 1 GB on the drive that holds your home directory before retrying.
“No module named …” after a successful install
Restart QGIS once. Python's import cache occasionally needs a clean process to pick up the new environment.
Plugin starts but Run Maxent button is disabled
Open the Dependencies dialog and confirm the status is green. If it is, restart QGIS; if it is not, click Install / Update Dependencies again.
Security note on the virtual environment
QMaxent's environment is created with the standard Python venv module
and populated only from PyPI. The plugin does not execute arbitrary code
from remote sources at runtime. Saved-model files (.pkl) are a separate
concern; see Saving and reusing models for the
security note on loading pickle files from untrusted sources.